OpenVPN Endpoint on AWS in 10 Minutes
Note: This setup can be used on Red Hat or Debian based system on pretty much and VPS for example DigitalOcean. Skip to OpenVPN Server Setup to configure server on a non AWS instance. The script that is being used can be found on GitHub if you want to review it or fork it.
Overview
The purpose of this post is to show how to setup an OpenVPN endpoint on AWS for free in roughly 10 minutes. There are plenty of free VPN solutions that could be found on the internet but most have limitations. A few of the main issues with using a random VPN solution on the internet is they usually have low bandwidth limits unless you opt for paid version. Some of the solutions inject add into webpages you visit. The two major issues with using a random VPN solutions are security related. Issue one is that the endpoint can not be trusted the provider might be capturing all user traffic for a number of reasons. The second commonly seen issue is that the client that is provided gives the user access to the VPN but also uses there system as and endpoint or it install other software.
This solution uses a free AWS EC2 t2.micro instance all that is required is creating an AWS account. For the OpenVPN installation it is completely scripted only requiring a few questions to be answered. I have been using an AWS issue for some time now with no apparent issues. I am not going to show how to navigate through the AWS management console since it pretty self explanatory. Also before the creation of the EC2 instances make sure your public key is in AWS management console.
The limitations of using the AWS free tier.
- 750 hours of Amazon EC2 Linux t2.micro instance usage (1 GiB of memory and 32-bit and 64-bit platform support) – enough hours to run continuously each month
- 30 GB of Amazon Elastic Block Storage in any combination of General Purpose (SSD) or Magnetic, plus 2 million I/Os (with EBS Magnetic) and 1 GB of snapshot storage
- 15 GB of bandwidth out aggregated across all AWS services
AWS Setup
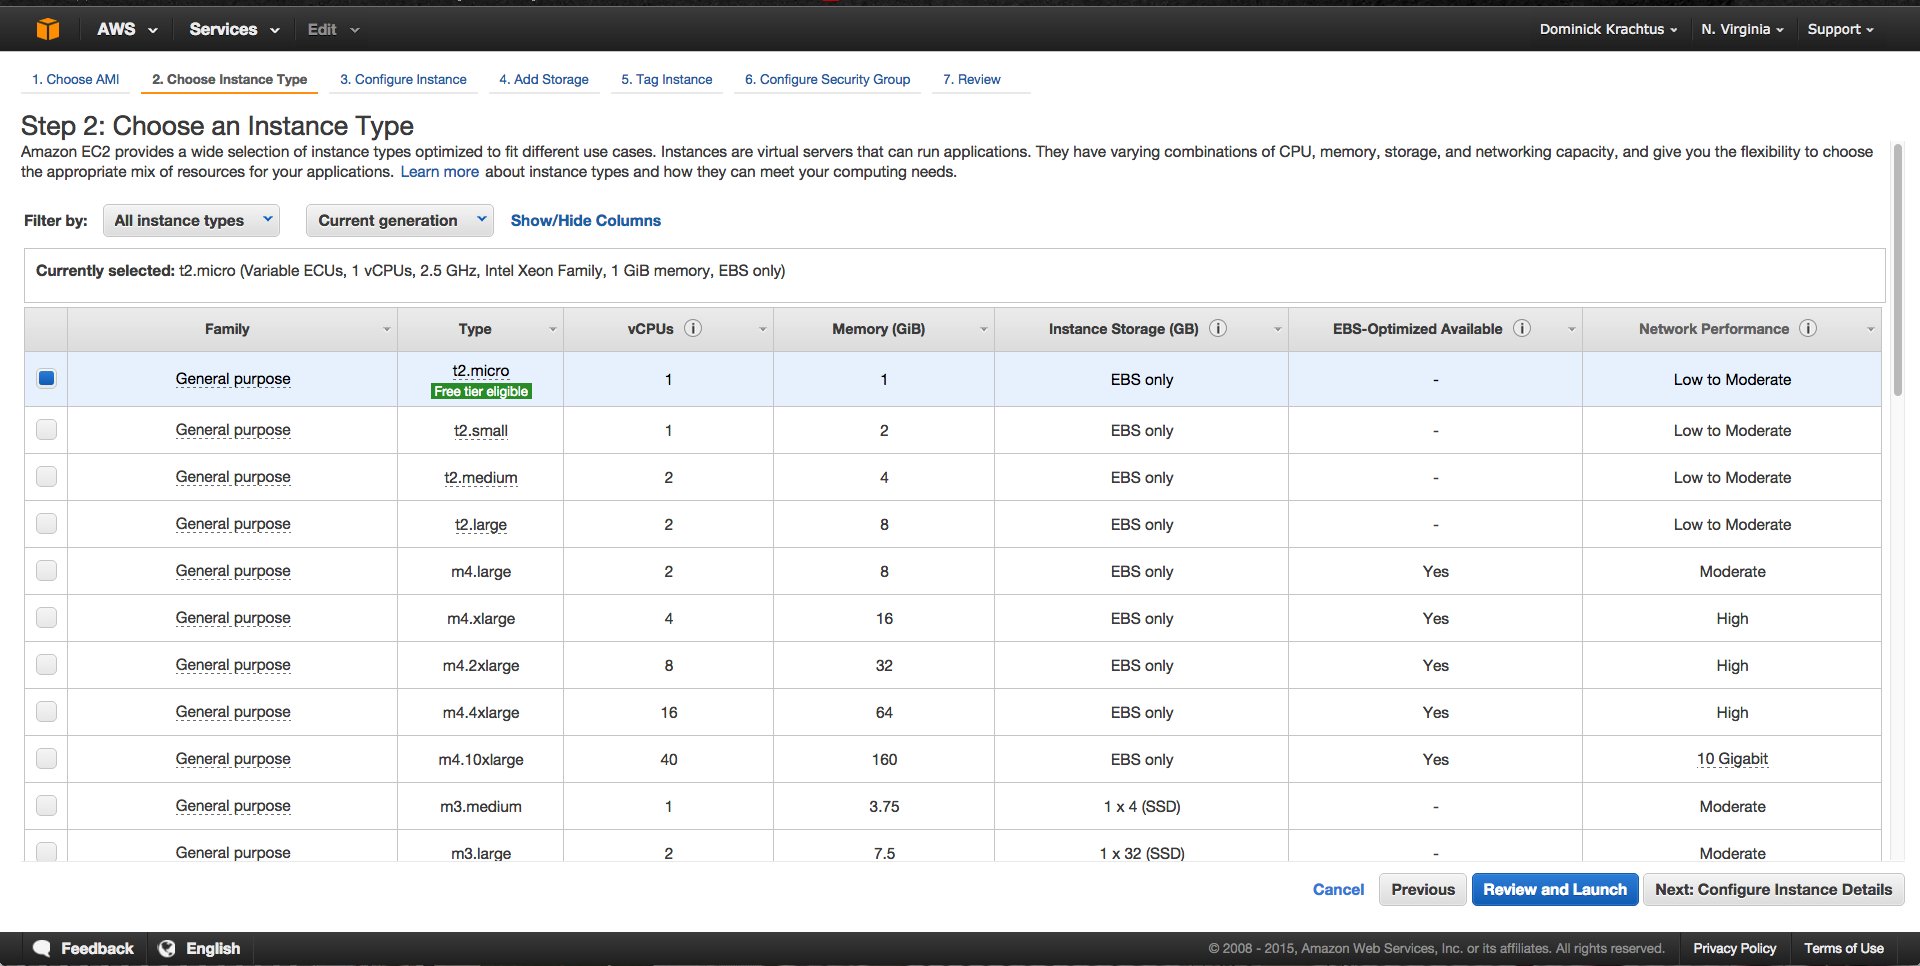
On the AWS management console in the EC2 we are going to want to launch a new instance. The OS can be Red Hat or Debian based, for this I chose to use an Ubuntu Server 14.04 LTS image. Since this is only a VPN endpoint CPU performance and Disk space isn't that big of a deal making the t2.micro instance the best choice plus its also in the free tier.
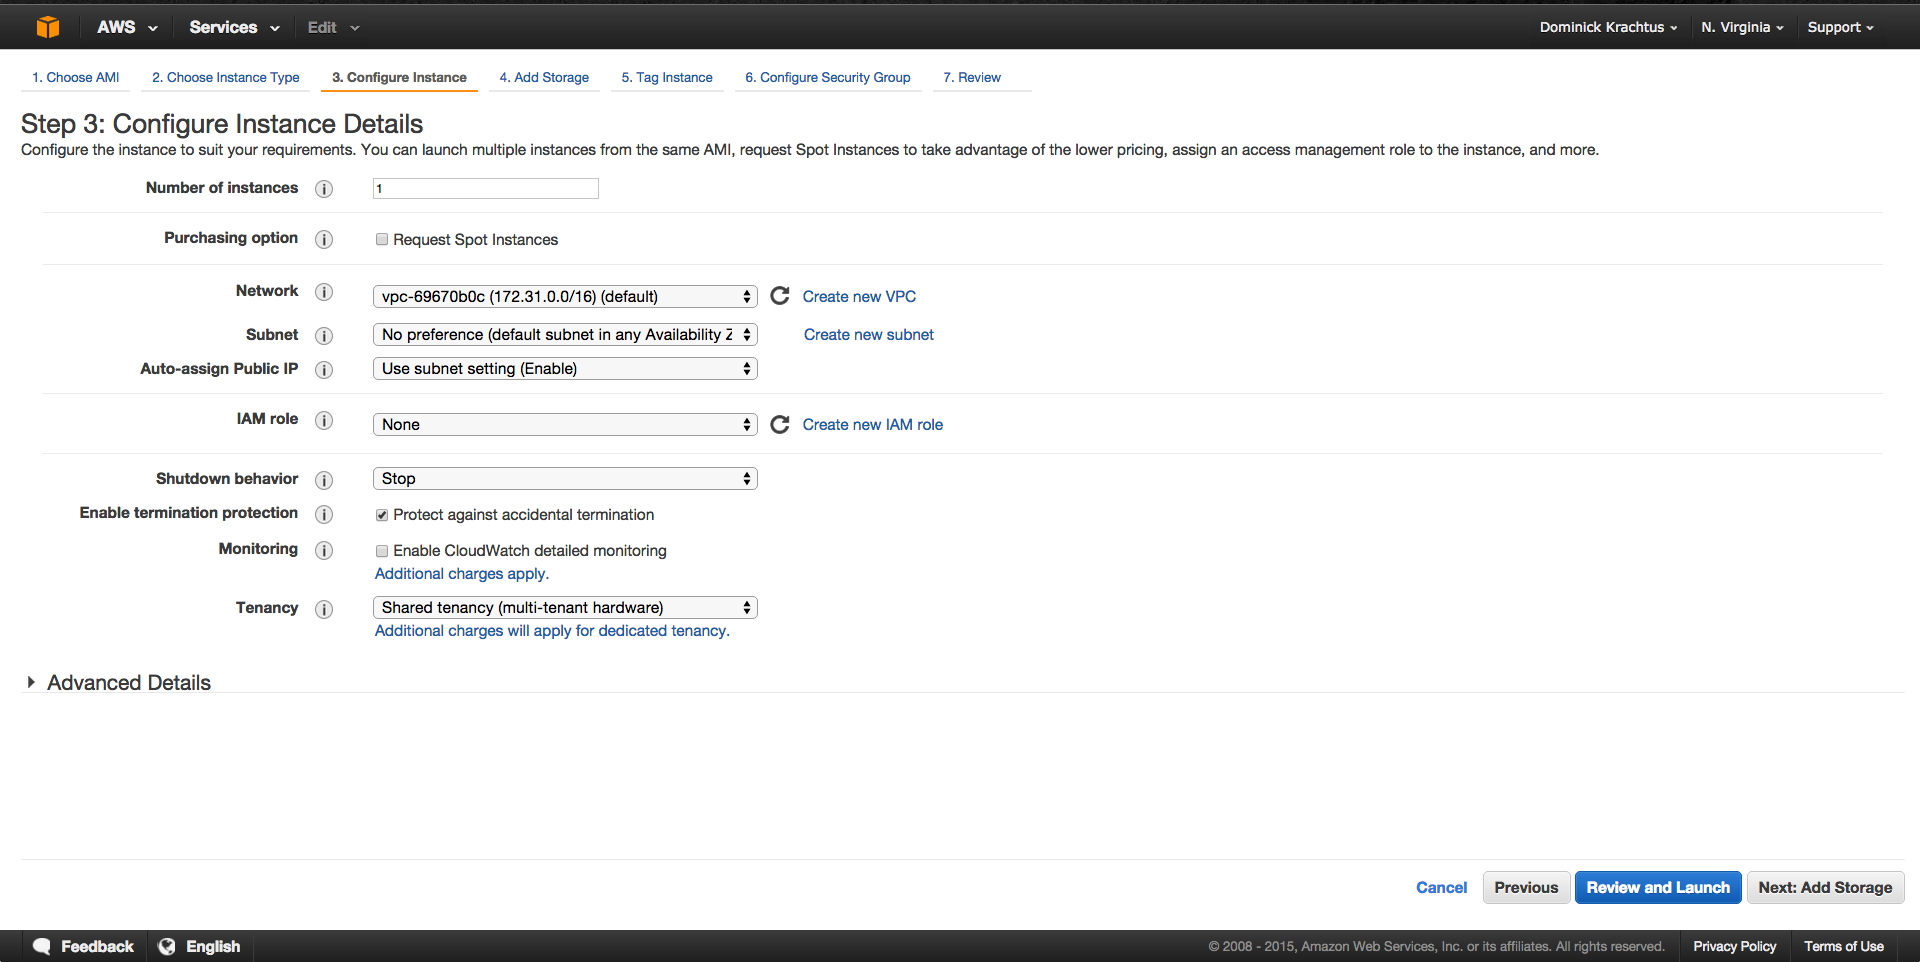
On the "Configure Instance Details" page the only change that needs to be made is to check the box "
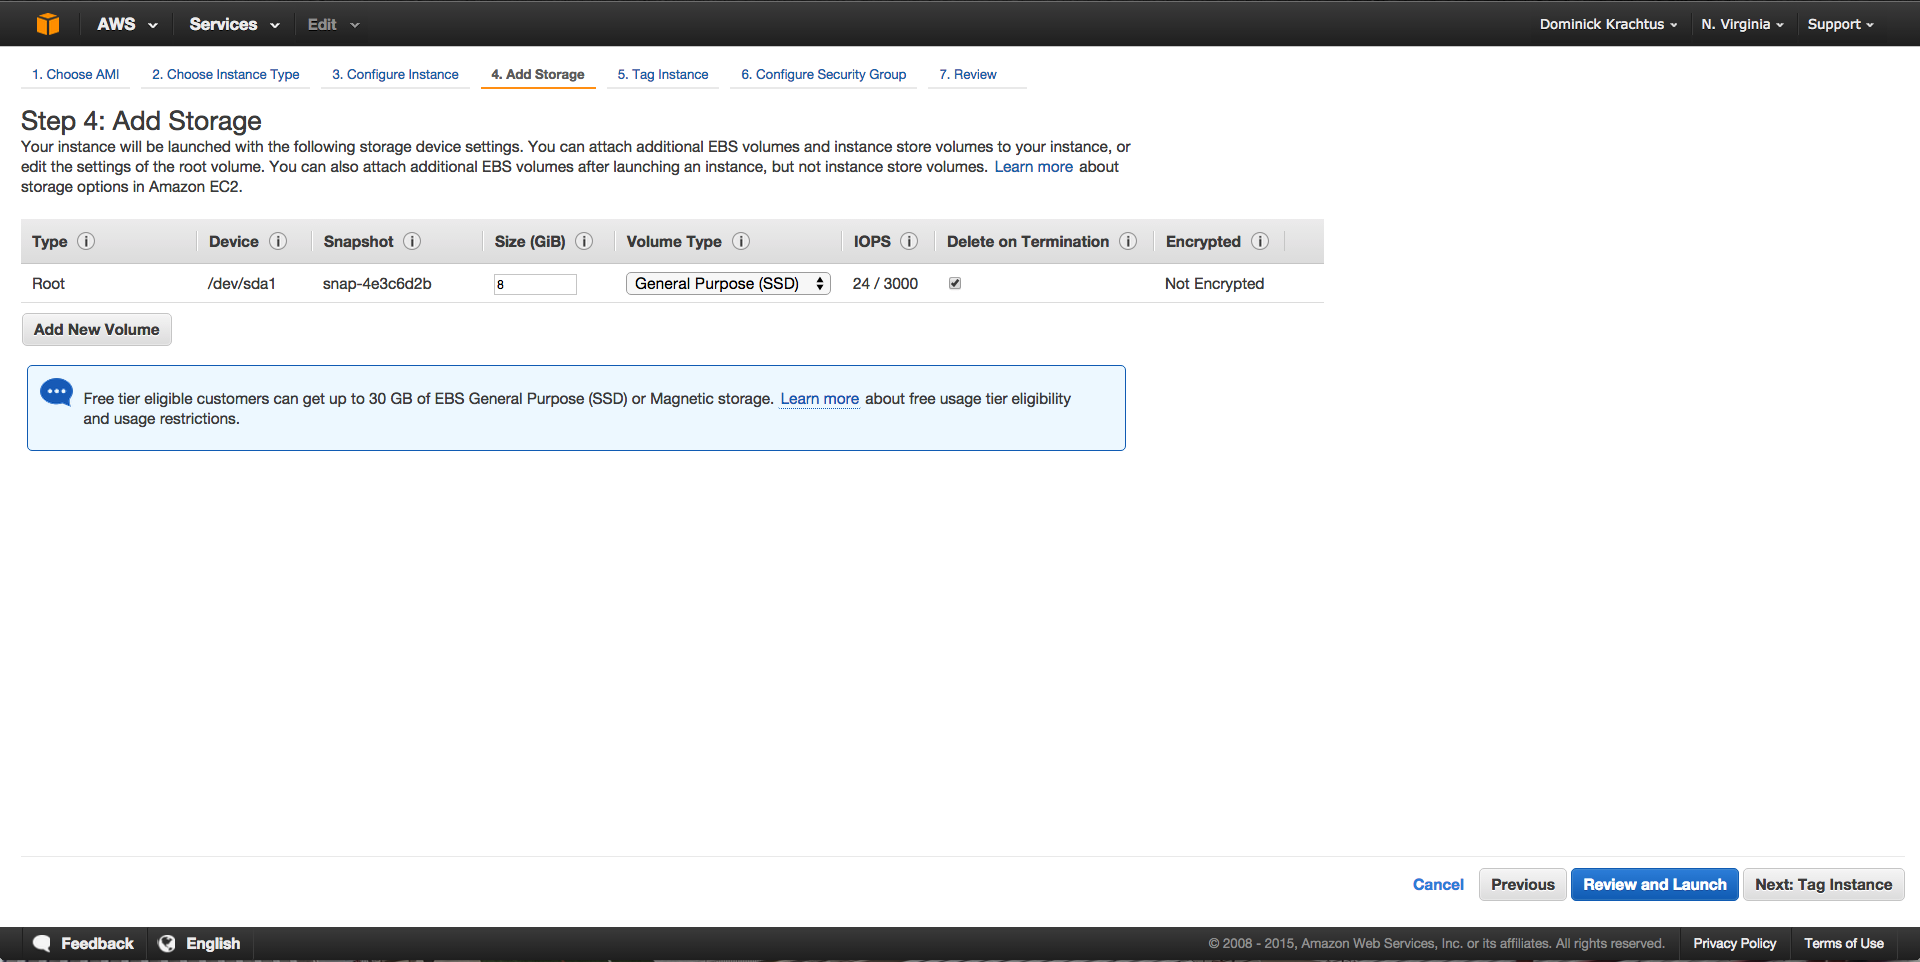
The "Add Storage" page no change need to be made unless for some reason you desire more disk space. Keep in mind the free tier can only use 30GB of storage total.
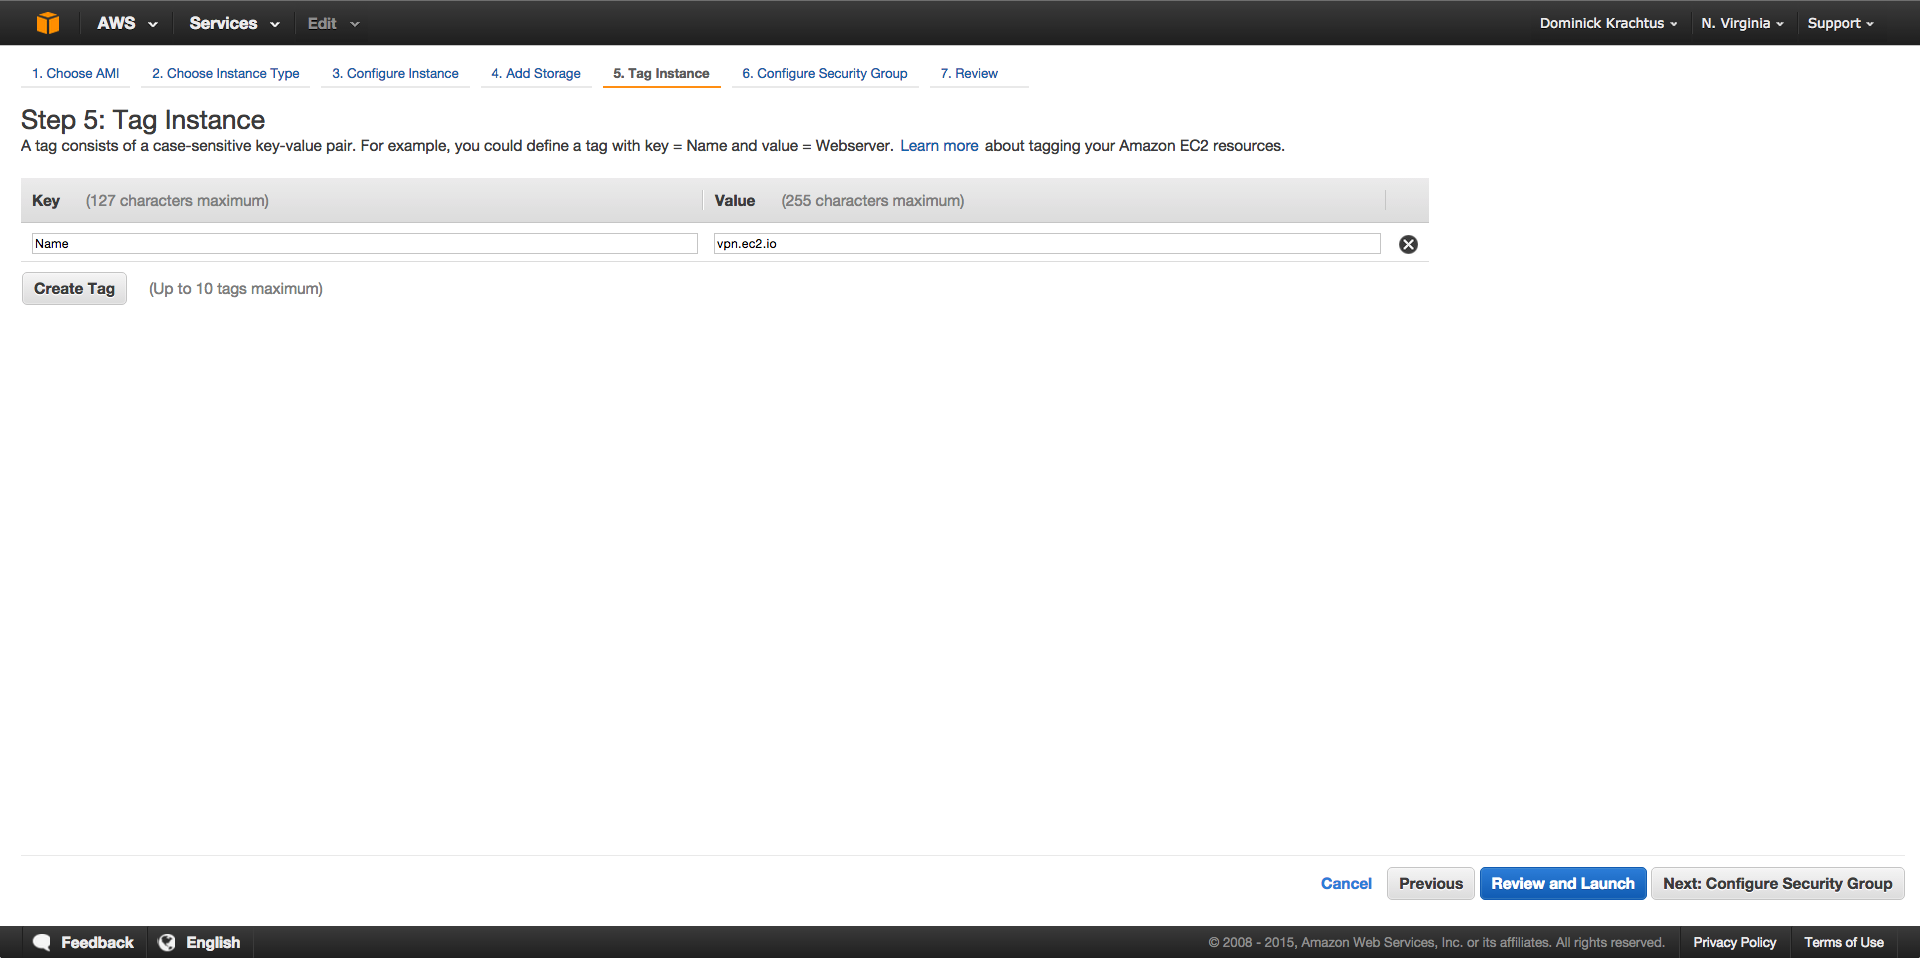
On the "Tag Instance" page in the "value" section is where you would name the instance.
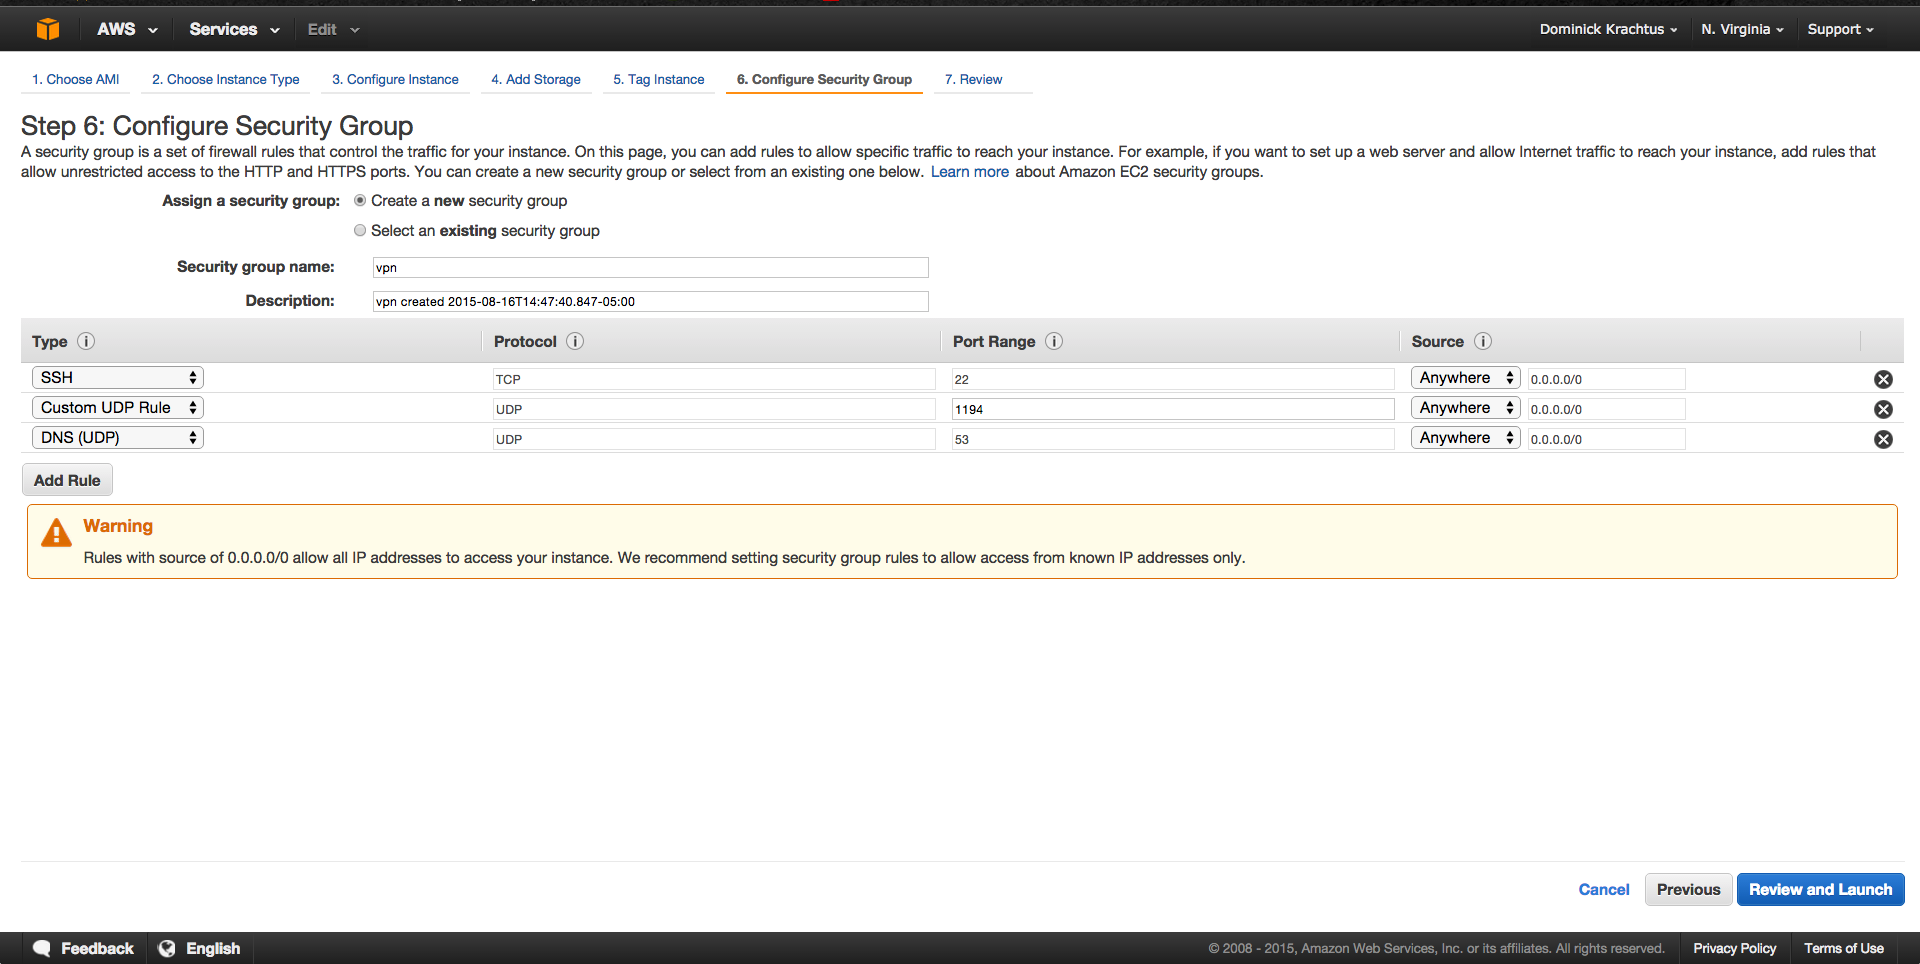
The "Configure Security Group" page is the most important part of the setup since the instance is NATed the appropriate ports need to be opened and mapped correctly. Make sure "Create a new security group: is checked. the security group name and description can be set to whatever is desired. The following rules need to exits for this to work.
- SSH TCP port 22 with source from anywhere
- Custom UDP Rule UDP port 1194 source from Anywhere (Default OpenVPN port")
- DNS (UDP) UDP port 53 source from anywhere (Used as alternate OpenVPN port")
On the "Review and Launch" page double check to make sure everything looks correct. Click "Launch" and make sure to chose the correct key pair.
Once the Instance is launched find the public ip of instance on the AWS management console in the EC2 section. Also the log on username can be found from this page in my case the default user is Ubuntu. SSH to the the instances [email protected].
OpenVPN Server Setup
Now its time for the actual OpenVPN configuration. Note from this point on these steps can be applied to any Red Hat or Debian based system on pretty much and VPS. My other got to VPS provider is DigitalOcean. The script that is being used can be found on GitHub if you want to review it or fork it.
Once you are connected to your instance you are going to want to switch to root since all of the following steps will be adding packages and making other system changes.
As root run the following one liner to start the setup process.
wget git.io/v35Kx --no-check-certificate -O openvpn-install.sh; bash openvpn-install.sh
- Make sure the ip address is a private ip address on AWS or public ip address depending on you setup. If this looks good hit enter.
- What port do you want OpenVPN to listen on? 1194 is chosen by default but can be set to anything. If you chose different port make sure to make the appropriate changes to the security group on AWS.
- Do you want OpenVPN to be available at port 53 too? This is useful if the network your on is trying to block VPNs.
- Do you want to enable internal networking for the VPN? This will allow VPN clients to communicate between each other over the VPN. the Default is "No".
- What DNS servers do you want to use with the VPN? 1) Current system resolvers, 2) OpenDNS, 3) Level 3 4) Hurricane Electric or 5) Google.
- Last give a name for the client cert no spaces, or special characters.
- If everything looks good hit enter to continue the setup or ctrl+c and run script again to make changes.

- On an AWS instance or NATed VPS the script will prompt for the public ip address of the instance. This is usually the same ip used for SSH.

- At this point the server setup is complete all thats left is to download client config file and setup client.
Client Setup
Now that the Server is setup all that s left is to configure the client used to connect to the VPN. The config file can be used on Windows, Linux, OS X, iOS and Android.
- First we need to download the client configuration file easiest way is to use SCP
scp user@server-ip:~/client.ovpn Downloads/. or WinSCP on Windows - Install an OpenVPN client for your OS
Windows
- The OpenVPN client for Windows can be found on OpenVPN's Downloads page. Choose the appropriate installer version for your version of Windows.
- After installing OpenVPN, copy the unified *
.ovpnprofile to:C:\Program Files\OpenVPN\configWhen you launch OpenVPN, it will automatically see the profile and makes it available.
- Another Client I like to use is Viscosity which cost $10
- Note OpenVPN client need to be ran as Administrator
OS X
- Use Ttunnelblick which is free or my favorite Viscosity which cost $10
- To import move config file to ~ and within the client import the *.ovpn file.
Testing VPN
Once server is setup and client is installed lets check the current ip address of our client by simply typing "my ip" into google. This will return the ip address assigned by your ISP and as you appear on the Internet.
Now connect the OpenVPN client and connect to your VPN and go to google again and type "my ip" you should see a different ip address. If you also want to to see what DNS servers are being used go to DNSLeakTest and run "Extended Test" will check your DNS settings and confirm you are now using the DNS resolvers pushed by your VPN.
At this point you now have a full functioning VPN in a matter of minutes.
Let me know what you think of this article on twitter @TTLequals0 or leave a comment below!