OpenVPN with 2FA using FreeRADIUS and Google Authenticator
This implementation of OpenVPN is using pfSense with FreeRADIUS and Google Authenticator PAM (pluggable authentication module) to generate One-time passcodes. The end result is the user is prompted for credentials, they use their username and password + One-time passcode to authenticate.
For the server that will run FreeRADIUS I choose to to use Ubuntu server 14.04 LTS in a VM.
The first thing is to install NTP there are two main reasons for this. The first is since Google Authenticator uses TOTP algorithm (time-based one-time password) having an out of sync system clock will lead to the passcodes that are generated being invalid. The second reason is since I decided to run the server in a VM there is a higher risk of time drift which would also result in invalid passcodes.
 sudo apt-get update
sudo apt-get install ntp
Up next install the FreeRADIUS package and all of the necessary dependencies.
sudo apt-get install build-essential libpam0g-dev freeradius libqrencode3 git
Download the Google Authenticator source from Github. Since it has been moved there from Google Code.
 git clone https://github.com/google/google-authenticator/
cd ~
cd google-authenticator/libpam/
make
make install
Since we will be using local accounts on the server its a good idea to make a group to put users in if they no longer need access instead of removing them.
addgroup disabled-radius
FreeRADIUS Configuration.
FreeRadius configuration. With this configuration there is one aspect im not thrilled about but unfortunately as of now it has to be done. The problem is since FreeRadius needs to be able to read each users .google_authenticator token in their home directory FreeRadius needs to run as root. Since this isn't the best security practice I suggest to limit access to this machine and only use it for FreeRADIUS.
The first file that needs to be modified is /etc/freeradius/radiusd.conf we need to configure FreeRadius to use the root user and group.

change from this:
user = freerad
group = freerad
To this:
user = root
group = root
The next file that needs to be edited is /etc/freeradius/users. We need to add the disabled-radius group to the "Deny access for a group of users." section.
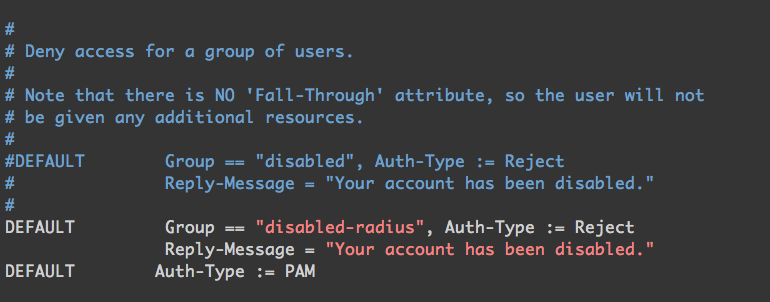
Add this to the end of the commented out section.
 DEFAULT Group == "disabled-radius", Auth-Type := Reject
Reply-Message = "Your account has been disabled."
We also going to add the rule to use PAM libraries for authentication.
DEFAULT Auth-Type := PAM
Next up to edit is /etc/freeradius/sites-enabled/default. This will enable the use of PAM for the FreeRADIUS server. To do this uncomment "pam" after the line "# Pluggable Authentication Modules."

Now we need to edit/etc/pam.d/radiusd to tell FreeRADIUS to use local unix password plus the Google Authenticator passcode.
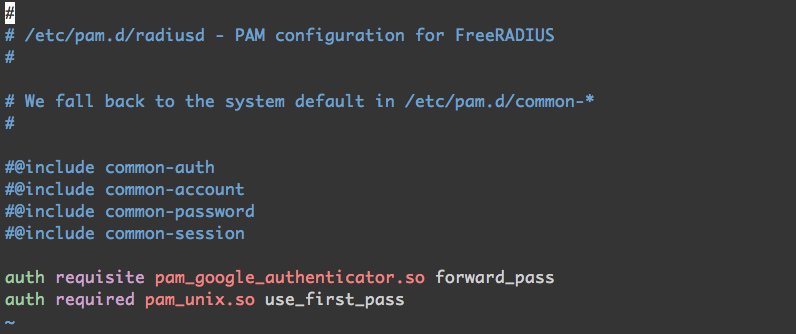 Comment out all of the lines that begin with "@" and add the following to the end.
 auth requisite pam_google_authenticator.so forward_pass
auth required pam_unix.so use_first_pass
To change the shared secret or to specify which clients will be connecting to the server this file needs to be edited. /etc/freeradius/clients.conf There many ways to specify the hosts that communicate with this server for authentication.

User Configuration.
Once FreeRADIUS is configured we are going to create a test user to see if it all works. The password can be simple since this is for testing and this user can be disabled or removed from system later. I used "test123" as password.
adduser test-user
After the user is created go ahead and login as that user.
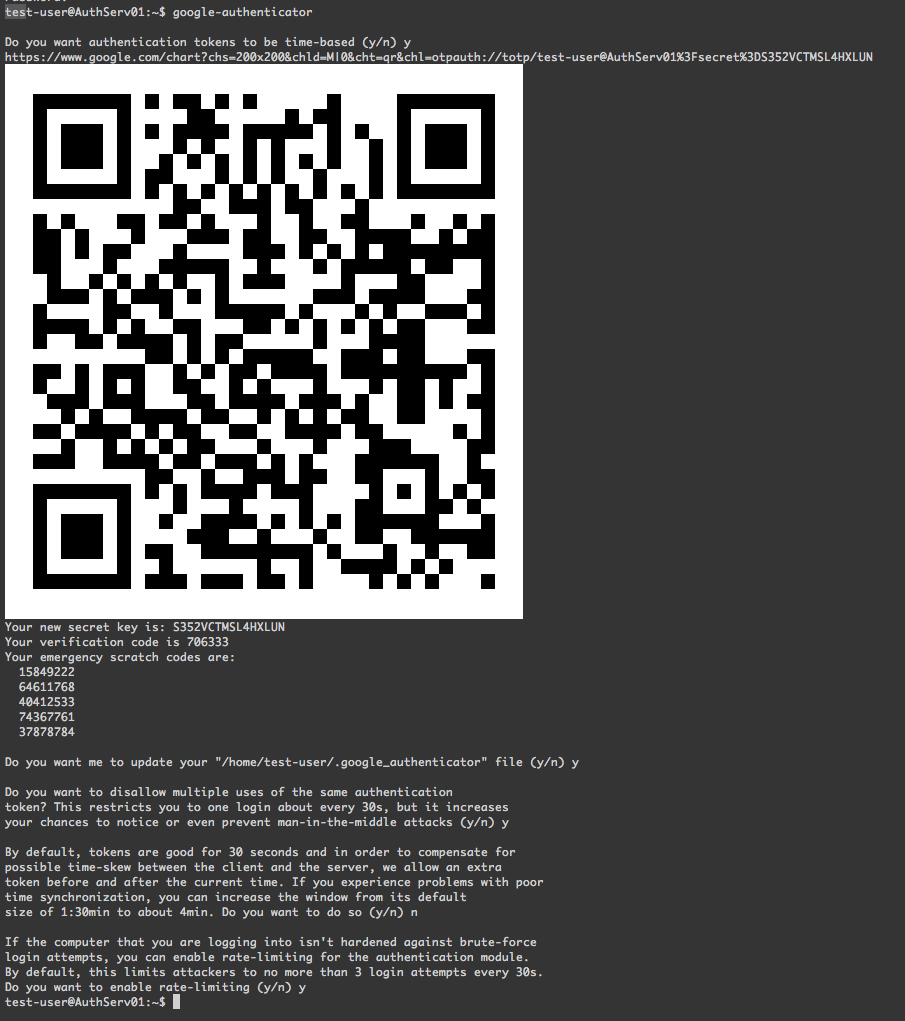
su test
google-authenticator
If all goes this will be the output. Now that we have the QR code import it into the Google Authenticator app (or whatever is being used for OTP tokens).
Test Configuration.
Time to test the configuration. First restart the FreeRADIUS service so the new configuration gets loaded.
sudo service freeradius restart
Use the following command to see if user can authenticate with the localhost.
radtest username unix_password+google_auth localhost 18120 testing123
example:
radtest test-user test123708169 localhost 18120 testing123
If everything is configured properly and the authentication the output should look like this.

OpenVPN Configuration.
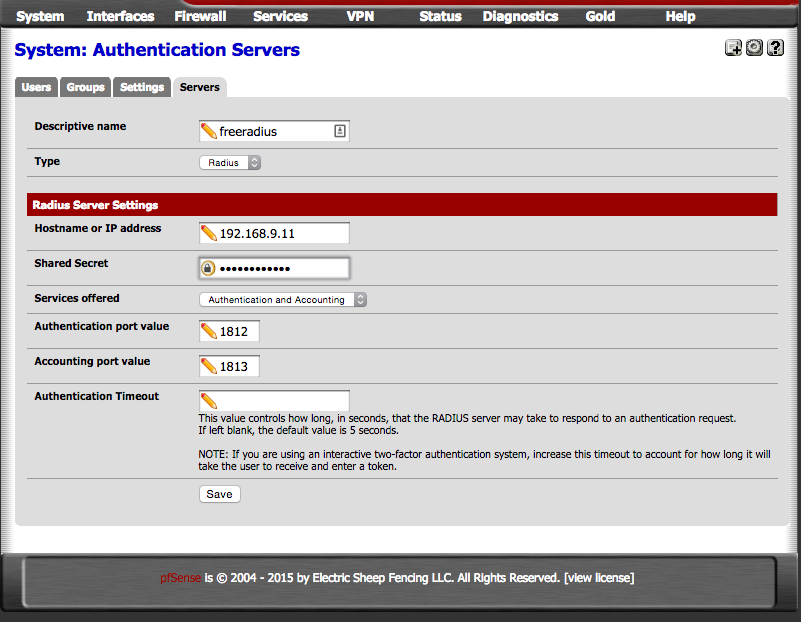
Now its time to tell OpenVPN to use RADIUS for authentication. Log into pfSense web interface and navigate to System > User Manager and click on the servers tab and then the "+" to add a new one.
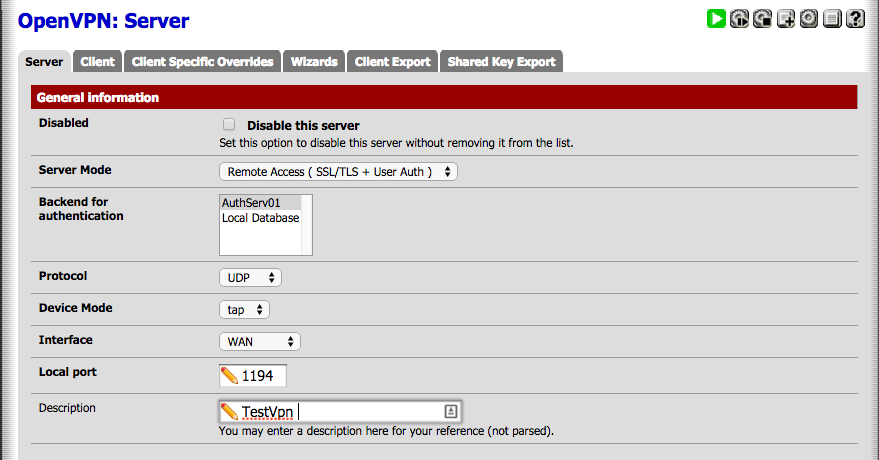
After the RADIUS server navigate to VPN> OpenVPN then edit server and select the newly added server in the "Backend for Authentication" box.
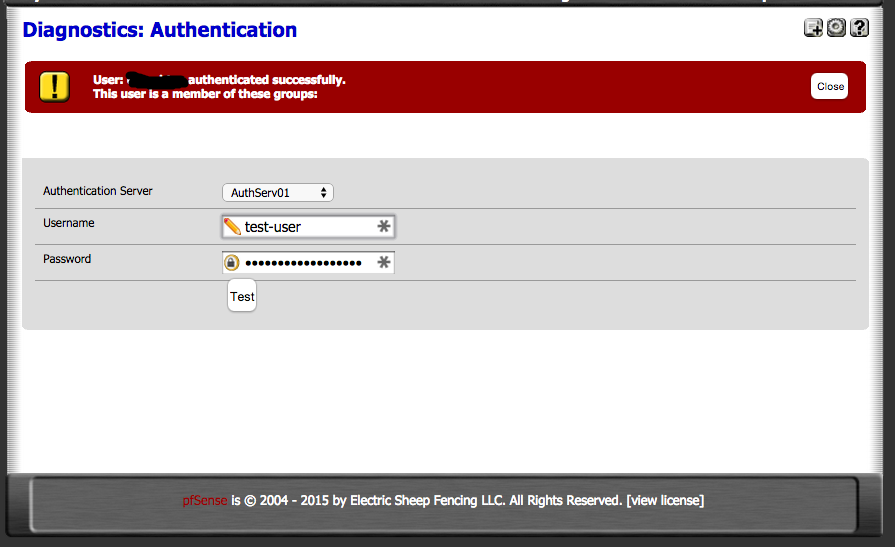
Test to see if router can communicate with RADIUS server by going to Diagnostics > Authentication. Select the RADIUS server from dropdown and enter username and unix password + one-time passcode.
Troubleshooting.
If for some reason the FreeRADIUS fails to start or cant communicate with host try this to see if there are any errors when starting service.
sudo service freeradius stop
sudo freeradius -X
If the service starts correctly the expected output is this:

Another good tool for testing radius server is NTRadPing.
Output for bad credentials:

Output for unable to communicate with server:

Output for successful authentication:

If there is issues communicating with the server it may be necessary to add allow rules for the device that will be using the server. In my case my router is accessing the server.
sudo iptables -A INPUT -p udp -s 192.168.9.1 --dport 1812 -i eth0 -j ACCEPT
sudo iptables -A INPUT -p udp -s 192.168.9.1 --dport 1813 -i eth0 -j ACCEPT
sudo iptables -A INPUT -p udp -s 192.168.9.1 --dport 1814 -i eth0 -j ACCEPT
save firewall settings:
sudo sh -c "iptables-save > /etc/iptables.rules"
Invoke these rules at boot i added this line at the eth0 interface configuration in /etc/network/interfaces.
pre-up iptables-restore < /etc/iptables.rules
Let me know what you think of this article on twitter @TTLequals0 or leave a comment below!